
How to use the Inbound / Outbound file feature
Use this guide to make BAPLIE Viewer Online classify your files as Inbound or Outbound.
Note: only a user with Administrator privileges, or a team member with “View & Edit” permissions, can set up this feature.
Where you see the classification
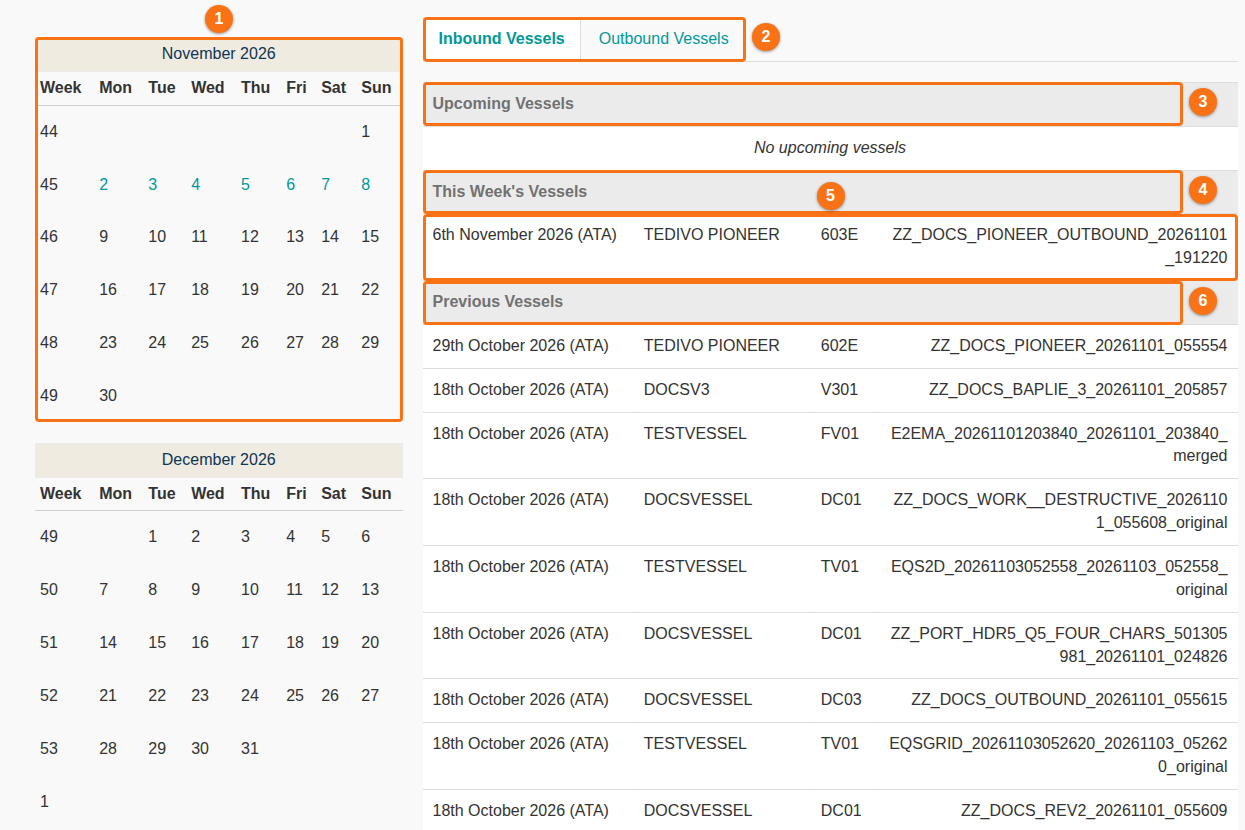
Section titled “Where you see the classification”When your facility uses this feature, the Home page has the tabs Inbound Vessels and Outbound Vessels (2 in the picture). Each tab has its own lists Upcoming Vessels, This Week’s Vessels and Previous Vessels. Click a tab to see the files of that class. For all the parts of the page, see How to use the Home page.
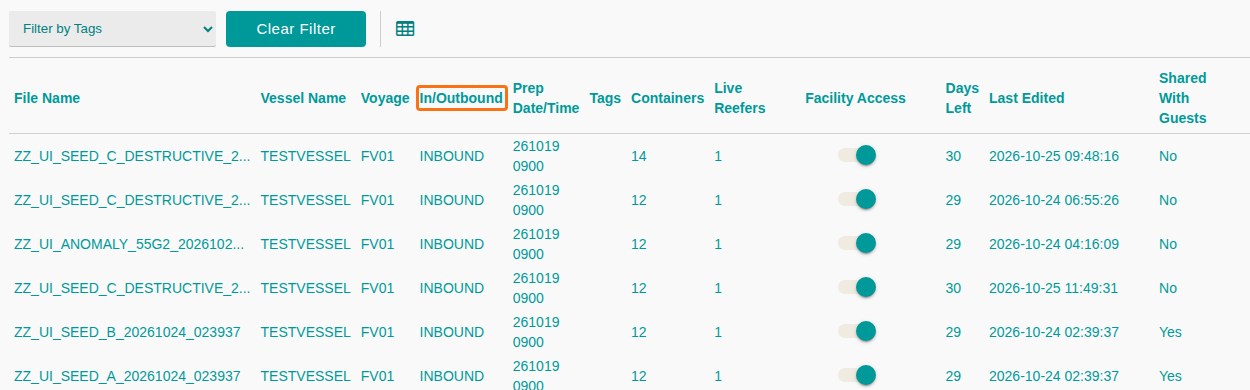
The file list on the Upload BAPLIE page also has an In/Outbound column.
Set up the feature
Section titled “Set up the feature”-
In the Function Menu, click Manage Facility.
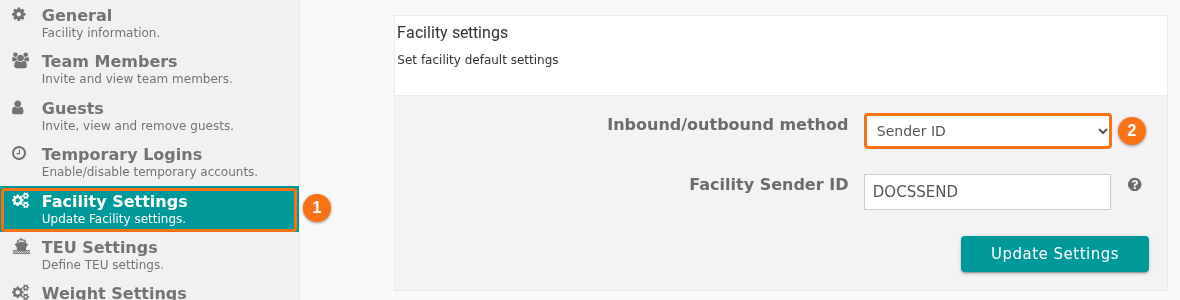
- If you are not an administrator, this option is Facility Info. Click Facility Settings (1 in the picture). The list is called Inbound/outbound method there (2 in the picture).
-
Click Facility Settings.
-
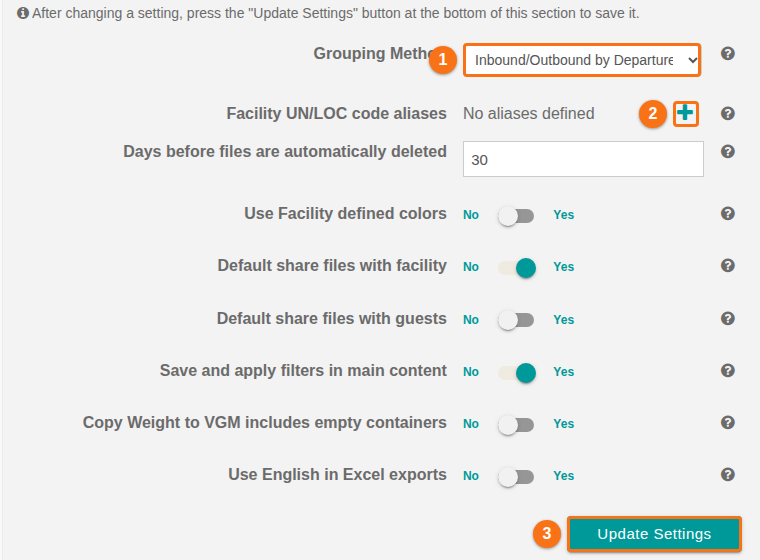
Find Grouping Method (1 in the picture). The drop-down list shows how BAPLIE Viewer Online classifies your files. The picture shows an option that starts with Inbound/Outbound by Departure.
-
Choose one method:
- No Method Selected: you do not want to use this feature.
- Inbound/Outbound by Departure Port: classify the files by port.
- Click the + (plus) button (2 in the picture) to enter your Facility UN/LOC code aliases. A UN/LOC code is the UN code of a port.
- Enter a list of codes. Separate them with a comma or a space.
- If the LOC+5 segment of the file has a Place/ Location ID, Related Place/ Location 1 ID or Related Place/ Location 2 value that matches one of your port codes, the file is Outbound.
- If there is no match, the file is Inbound.
- Inbound/Outbound by Sender ID: classify the files by sender.
- Enter your facility Sender ID in the text box.
- If Sender ID in the file is equal to your code, the file is Outbound.
- If Sender ID in the file is not equal to your code, the file is Inbound.
- Group by Tag Name: this does not classify the files as Inbound or Outbound. The Home page shows one tab for each file tag instead. See How to use file tags.
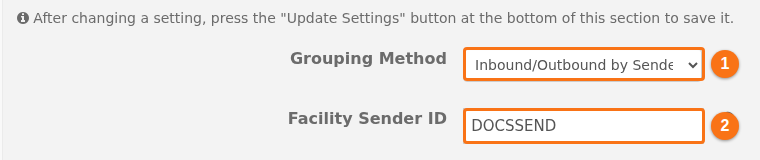
In the picture, Grouping Method (1) is set to the Sender ID option. The Facility Sender ID box (2) shows below it.
-
Click Update Settings (3 in the picture) to save.
Find your Sender ID and port code
Section titled “Find your Sender ID and port code”If you do not know your Sender ID or port code, look in the Header Details of a BAPLIE file.
- Upload a file that you know is Inbound or Outbound.
- Open the file in BAPLIE Viewer Online.
- In the Function Menu, click Validation.
- Click Header Details.
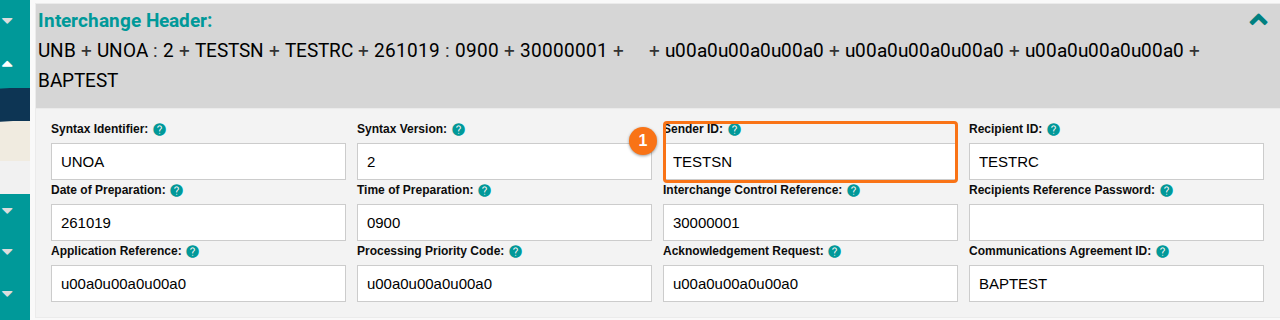
- Open the first section, Interchange Header. In an Outbound file, Sender ID (1 in the picture) shows your Sender ID.
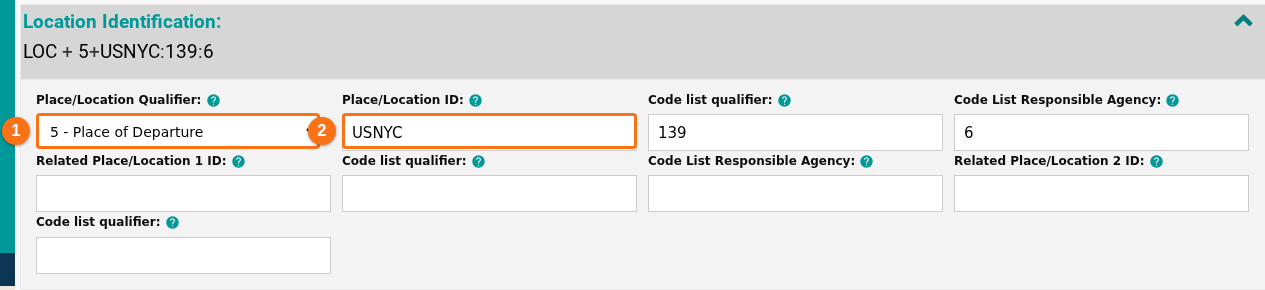
- Scroll down to the Location Identification sections and click one to open it. Place/Location ID and Place/Location Qualifier help you find your port code. In the picture, the Place/Location Qualifier is 5 - Place of Departure (1 in the picture) and the Place/Location ID is the port code USNYC (2 in the picture).