
How to customize the ship elements in 3D Vessel View
Use this guide to show or hide parts of the vessel in the 3D Vessel View, and to set the bridge, smoke stacks, deck cranes and deck lashes.
Before you start: open your file.
Open the 3D Vessel View
Section titled “Open the 3D Vessel View”- In the Function Menu on the left, open Visualization and click 3D Vessel View. The view opens in a new tab of your browser.
- Look at the top of the page. The Mode dropdown has different modes. View is the default. When you choose another mode, the options below the top bar and the key on the right change.
Show or hide ship elements (View mode)
Section titled “Show or hide ship elements (View mode)”In View mode, use the check boxes in the top bars. They are marked with orange boxes in the picture.

| Check box | What it does |
|---|---|
| Vessel | Shows or hides the vessel skin. |
| Hatch Covers | Shows or hides the hatch covers. |
| Show wireframes | Shows or hides the wireframes (the outlines of the containers). This check box is at the top right of the page. |
To find one container, use Show wireframes. The container is highlighted and all other containers have a wireframe. Point to a container to see its ID. You can copy the number and use it in the search.
Note: the bar also has a Show IDs check box.
Add ship elements (Settings mode)
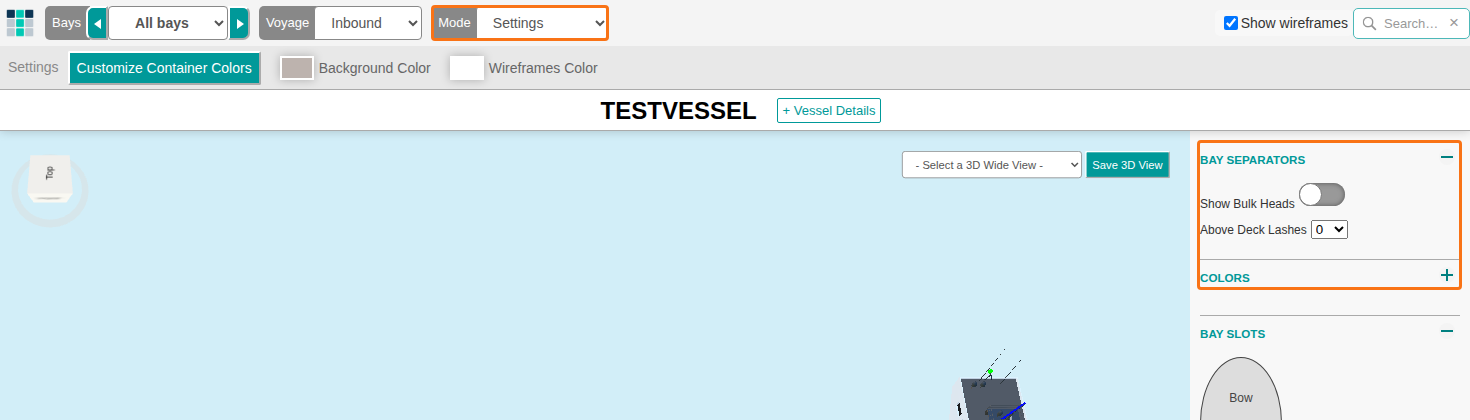
Section titled “Add ship elements (Settings mode)”- Click the Mode dropdown and choose Settings. Use this mode to set the place and the form of the vessel bridge, smoke stacks, deck cranes and deck lashes.
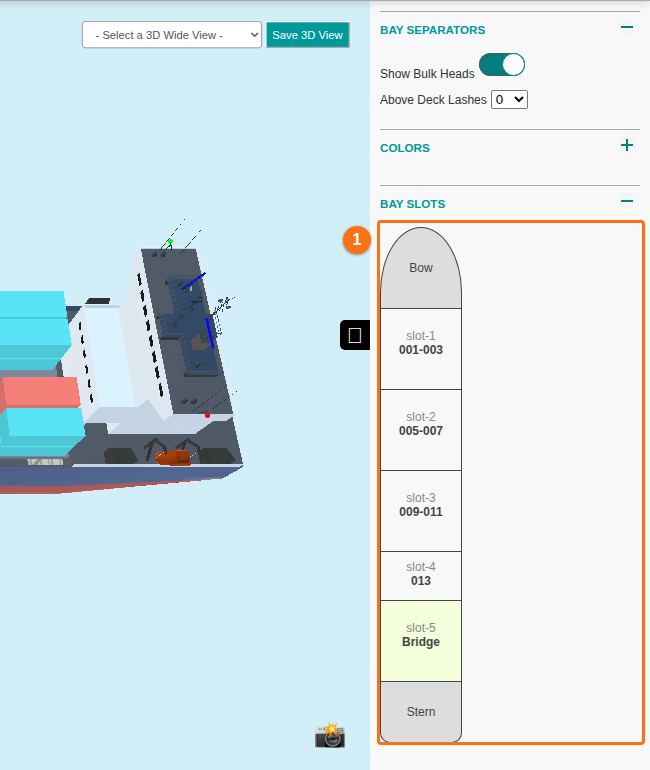
- Look at the panel on the right. The picture shows the Mode dropdown and the panel (orange boxes). The panel has the sections Bay Separators, Colors and Bay Slots.
Bay Separators
Section titled “Bay Separators”- To show or hide the bulk heads, use the Show Bulk Heads switch. You can see bulk heads only for containers below deck.
- To see the change, switch back to View mode. Hide the vessel skin. Then zoom in on a bay.
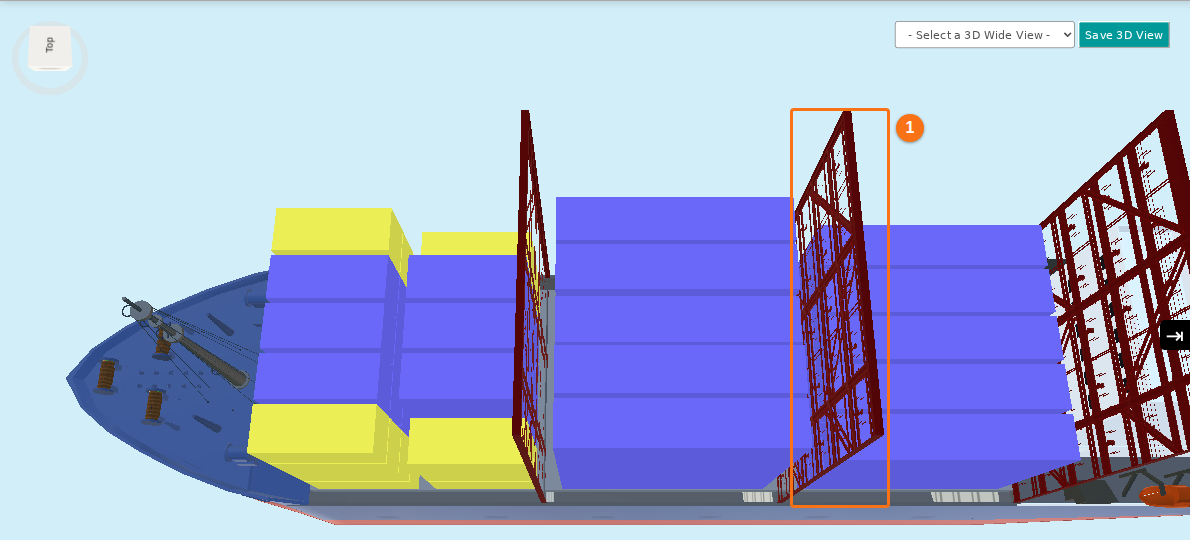
- To set the height of the deck lashes, use the Above Deck Lashes dropdown. The default is 0, and then no deck lashes show. The picture shows a vessel with deck lashes: the dark red frames between the bays (1 in the picture).
Bay Slots
Section titled “Bay Slots”The Bay Slots section is a list of the slots of the vessel, from Bow to Stern (1 in the picture). Use it to set the bridge, smoke stacks and deck cranes.
- Click a bay slot. The available actions show. You can show or hide the deck lash or the bulk head of one slot.
- To add a bridge, a smoke stack or a crane, choose it in the Action dropdown.
- Click Go. The vessel updates and moves to fit the new element.
Change or delete an element
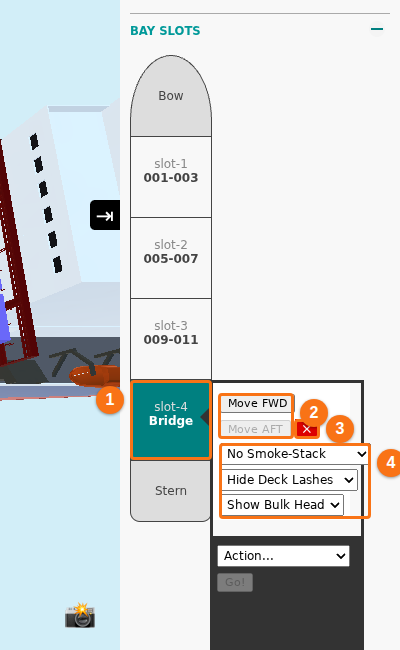
Section titled “Change or delete an element”- Click a slot that already has an element. A window opens next to the list. In the example, the bridge is already in slot-4 (1 in the picture).
- In the window, use Move FWD or Move AFT (2 in the picture) to move the bridge forward or aft to other slots. Use the dropdown lists (4 in the picture) to add a smoke stack to the bridge (No Smoke-Stack) and to show or hide the deck lash (Hide Deck Lashes) and the bulk head (Show Bulk Head) of the slot.
- To delete the element from the 3D model, click the red X (3 in the picture).