

How to print a sequence bay plan from 2D View
Use this guide to print a bay plan with a sequence sheet in 2D Bay View. A sequence sheet is a list of the containers in the order of work. Use it when you unload or re-stow containers.
Before you start: open your file. Move mode needs the Vessel Operations add-on for your facility and Admin or Edit permission. Gold members cannot use Move.
- After you upload a file on baplieviewer.com, open Visualization in the Function Menu on the left. Click 2D Bay View. The screen shows the vessel bay by bay.
- Look at the menu bar at the top. The first bay of the file shows, and Mode is View. In the Mode list (1 in the picture), choose Move. The Print Bay Plan button (2 in the picture) is at the right end of the row of buttons.

- Select the containers that you want to discharge or re-stow in the current bay (1 in the picture). Each selected container gets a number, in the order of the list Containers to move. To select containers in other bays, use the bay arrows at the top left.
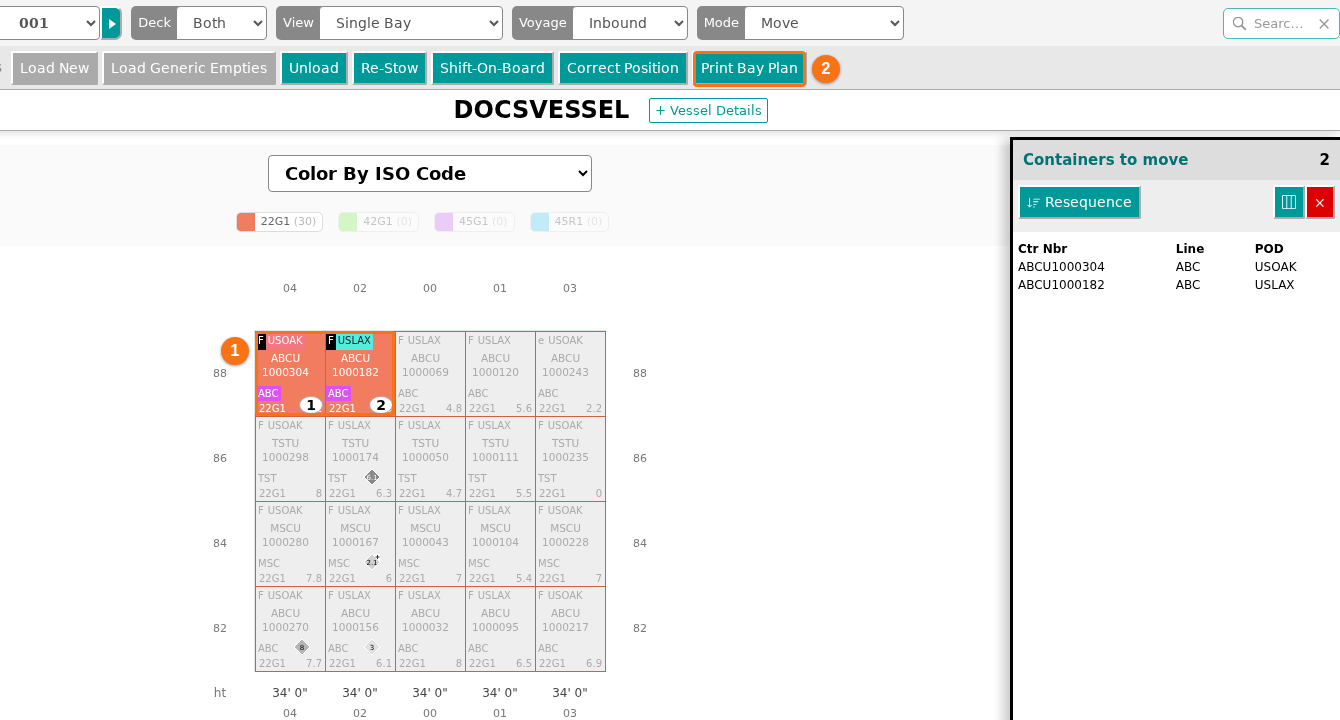
- The Print Bay Plan button (2 in the picture) is grey when the list Containers to move is empty. After you select containers, it becomes active. Click Print Bay Plan. The Bay Plan View PDF window opens. It asks you to select the document options. It has no list for the bays: the PDF has only the bays that have selected containers.
- Set the options (1 in the picture):
- The first list sets the pages. The picture shows Single page (above and below). Choose a single page for above deck and below deck, or Separate pages per deck.
- The second list sets the paper size: Letter, Legal, A4 or A3.
- The third list sets the page direction: Portrait or Landscape.
- The fourth list sets the legend. The picture shows Add Legend.
- Under Select table columns (2 in the picture), click a button to add a column. Ctr Nbr and Position are always included. You can choose up to 6 more columns, so the table has 8 columns at most. At the start, ISO, Line, POL and POD are chosen.
- If your facility has a logo, a list shows: Add Logo or Don’t add Logo.
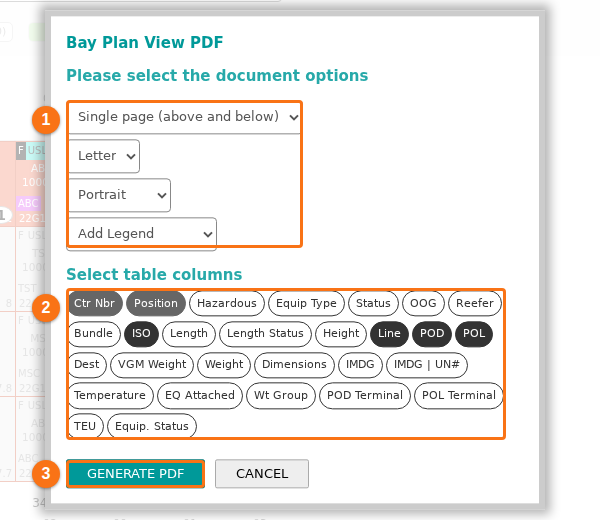
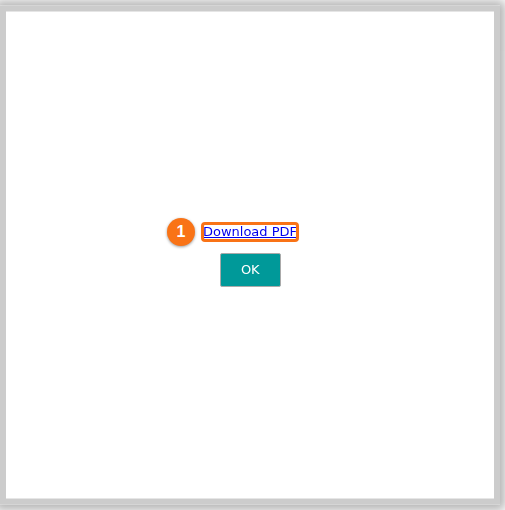
- Click GENERATE PDF (3 in the picture). The window shows “Generating pages, please wait…” and the progress in percent. When the PDF is ready, click Download PDF (1 in the picture). Then click OK.
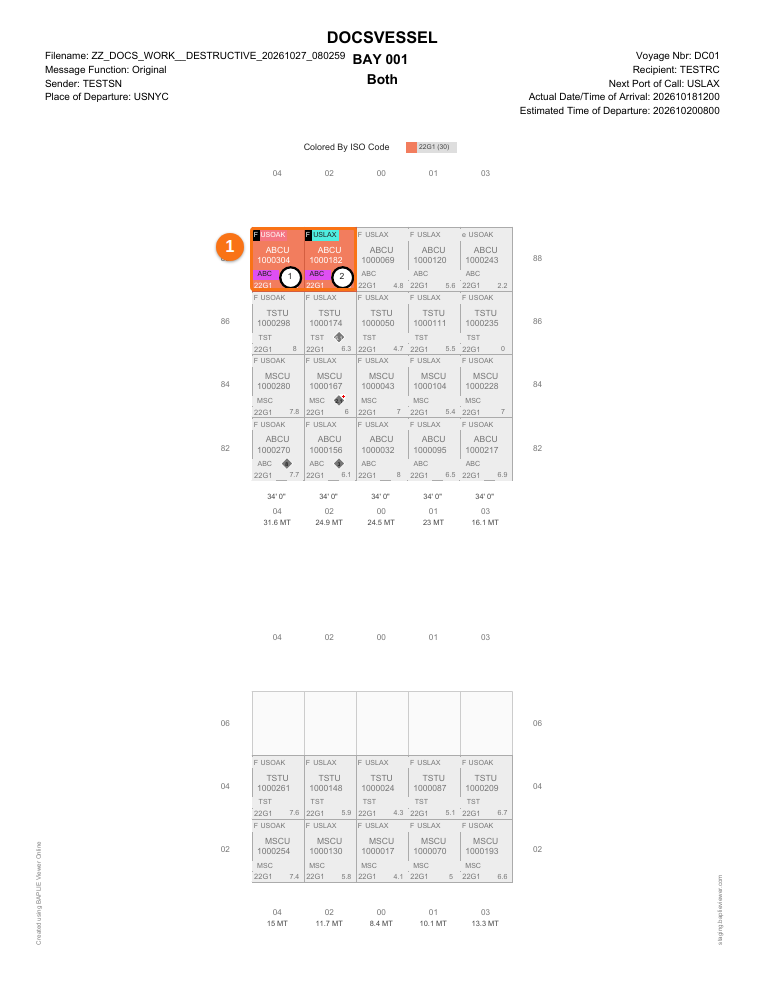
- Open the PDF that you downloaded. The first pages show the bays that have selected containers, one drawing for each bay. The selected containers are colored and marked with their numbers (1 in the picture). All the other containers are grey.
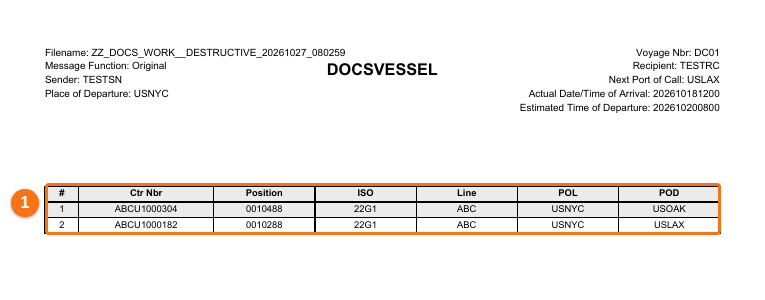
- After the drawings, a page has a table of the selected containers (1 in the picture). It has the number (#), Ctr Nbr, Position, and the columns you chose.
Good to know
Section titled “Good to know”- During a Re-Stow, after you place some containers, the plan shows the containers you placed in their new positions. The Print Bay Plan button stays active only while at least one container is still waiting in the list Containers to move.
- When Hazards View is on, the window has more options. See How to use Hazards View and print hazardous cargo in the 2D Bay View.