

How to edit one or more containers in 2D View
Use this guide to change the details of one or more containers in 2D Bay View. You use Edit mode to do this. You can change any detail of the container data in your uploaded BAPLIE file. You can also remove some properties from many containers at once.
Before you start: open your file. You need Admin or Edit permission for the file and a membership that includes Edit mode. Guest accounts and expired accounts cannot use Edit mode. On a touch screen that is narrower than 900 pixels, a window says that Move and Edit modes are not prepared for mobile devices unless you connect a pen or mouse.
Open Edit mode
Section titled “Open Edit mode”- After you upload a file on baplieviewer.com, open Visualization in the Function Menu on the left. Click 2D Bay View. A new tab opens with a picture of your BAPLIE data.
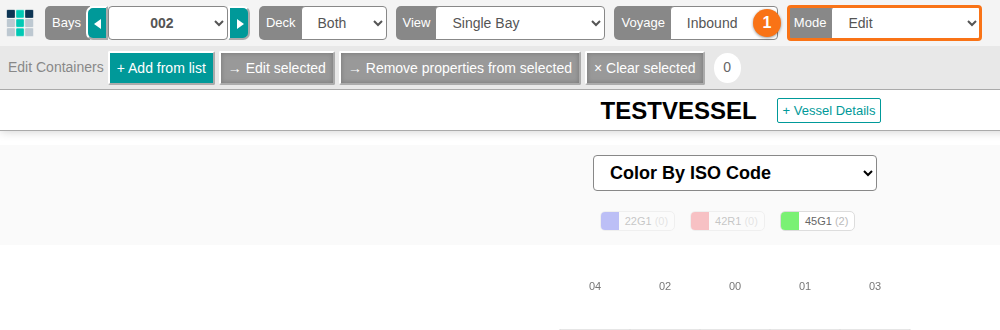
- Look at the top bar. The first bay of the file shows, and Mode is View.
- In the Mode list (1 in the picture), choose Edit. The bar Edit Containers shows below the top bar. It has these buttons: + Add from list, → Edit selected, → Remove properties from selected and × Clear selected. A number next to the buttons shows how many containers are selected.
- The view control in the top bar must show Single Bay or Mini Bays. You can select containers only in these two views. In Side and Deck a message says that you cannot select containers there.
- The status bar at the bottom of the screen shows a hint: “Please select containers, then click on the ‘Edit selected’ button.”
Select containers
Section titled “Select containers”You can select containers in these ways:
- Click a container. Click it again to remove it from the selection.
- Drag a rectangle over many containers in Single Bay or Mini Bays.
- Click a value in the panel Color & Filter. For example, click one port of discharge (POD). A window Add to the selection says “N containers match the filter and will be added to the selection (S already selected).” Click YES. In Single Bay view only the containers of the current bay count. For this panel, see How to use Color by, filters and the information panels.
- Search. Type the container ID in the box Search in the top bar and press Enter. In Edit mode the search adds the matching containers to the selection. It does not move the screen. If the search finds more containers than you typed, a window asks “N containers will be added. OK?”.
- Add from list. Click + Add from list. The window Add from list opens. Type or paste the container IDs, one per line (or separated by commas or spaces). Or click Select TXT file with container IDs to add and choose a .txt or .csv file. Click Add containers to selection. The application searches for each ID as the box Search does, so a container whose ID contains your text also matches. If some IDs are not found, a message lists them: “N containers were not found”.
All selected containers get a number in the bay. All other containers turn grey. The buttons → Edit selected and × Clear selected become active. To clear the selection, click × Clear selected.
Edit one container
Section titled “Edit one container”- Find the bay with the container. Use the Bays list or the arrows next to it.
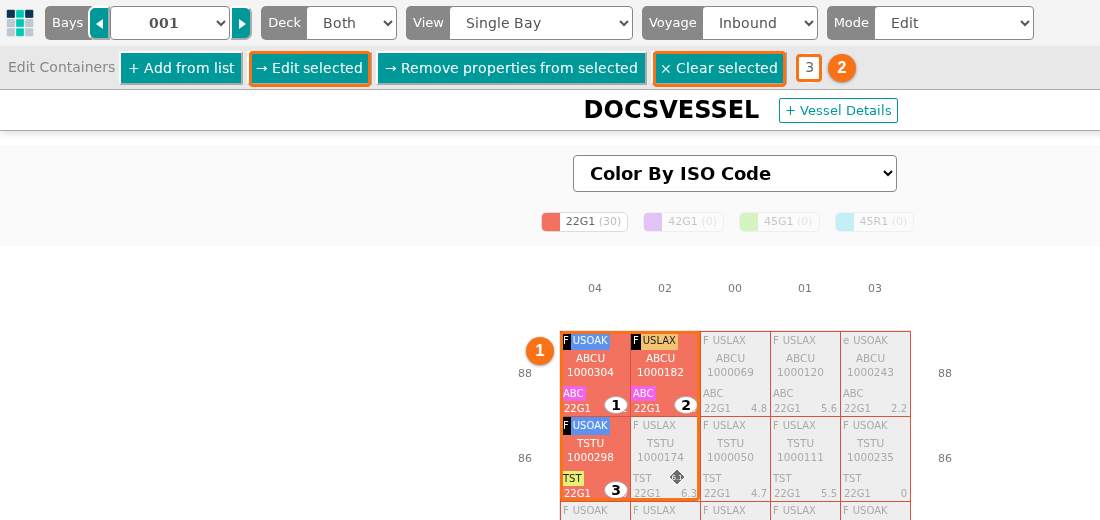
- Click the container you want to edit. All other containers turn grey. The number next to the buttons shows how many containers are selected (2 in the picture). The selected containers get a number in the bay (1 in the picture). The picture shows three selected containers. With one container, the number is 1.
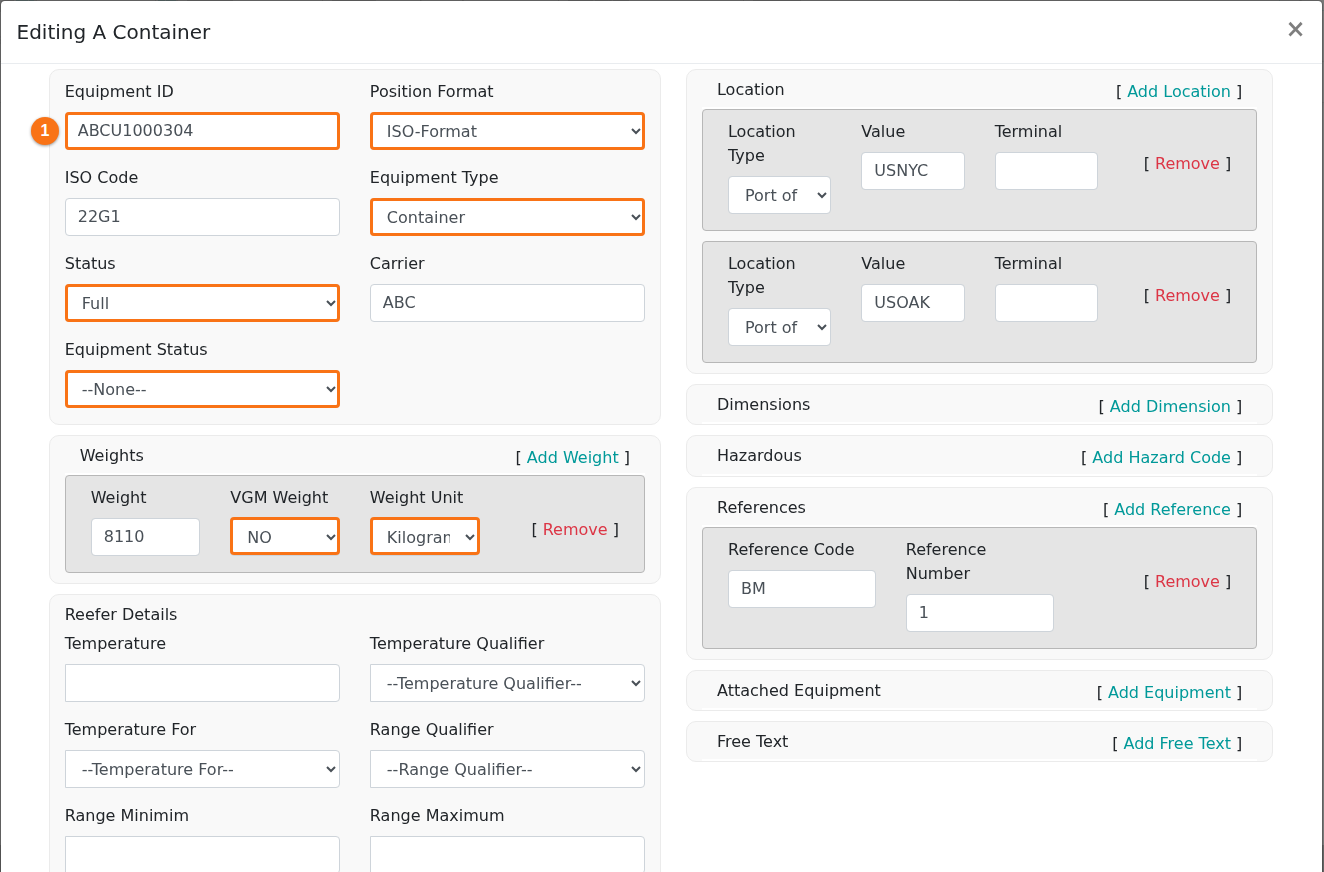
- Click → Edit selected. The Editing A Container window opens with the fields of the container. Equipment ID is the first field (1 in the picture). A field that has only fixed values is a list (drop-down). The picture boxes the lists. The right side has more sections, for example Location, Hazardous and References.
- Change the values you need.
- Click Save Changes at the bottom of the window to save.
To cancel: click Close at the bottom of the window. Your changes are not saved.
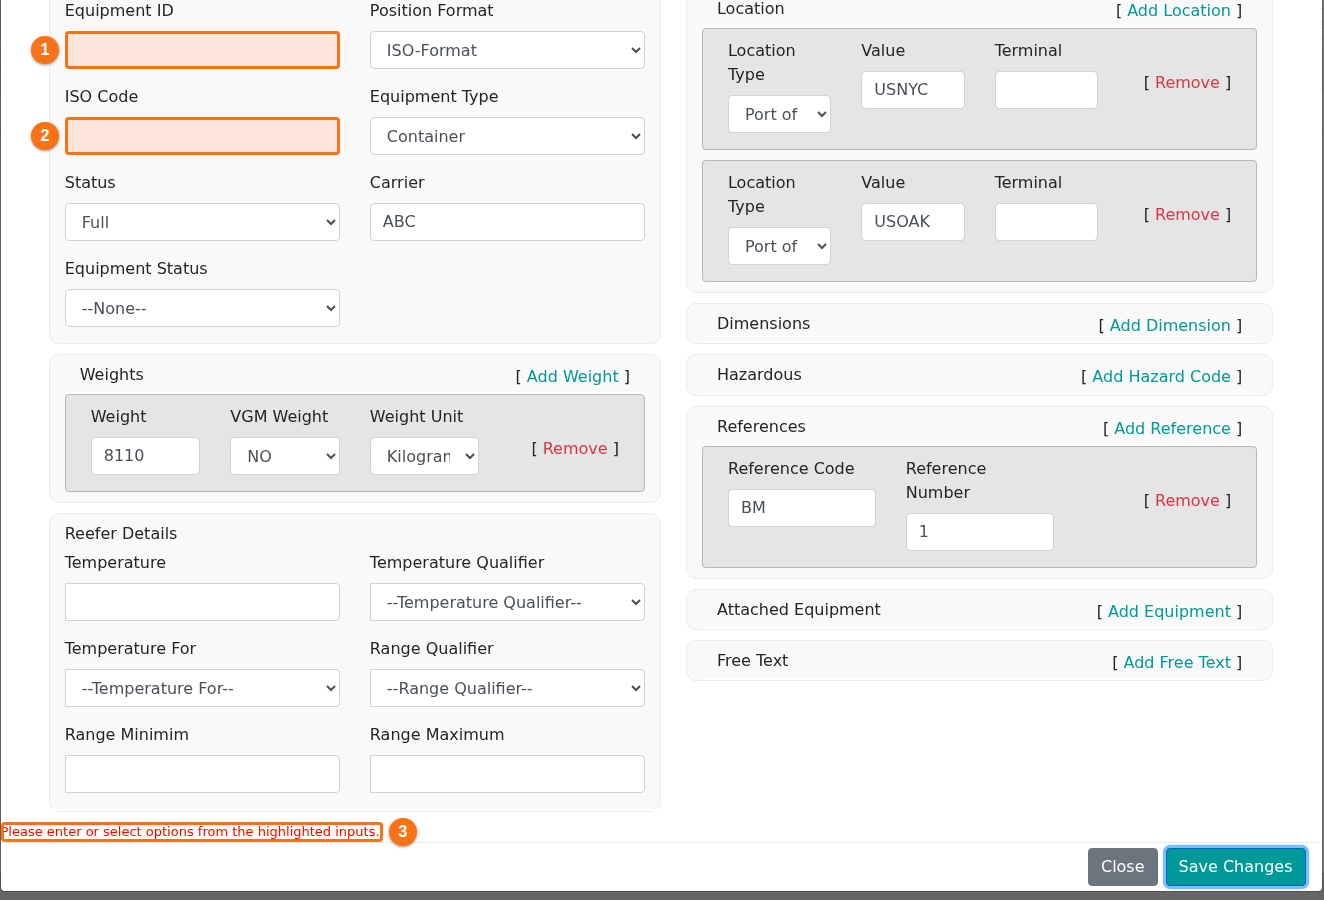
If a required field is empty, it turns pink (1 and 2 in the picture). A message at the bottom of the window says “Please enter or select options from the highlighted inputs.” (3 in the picture). The changes are not saved until you fill in the empty fields.
Edit many containers at the same time
Section titled “Edit many containers at the same time”You can change a group of containers at once. The changes are saved for all of them together.
- Select the containers you want to change. See “Select containers”. All other containers turn grey.
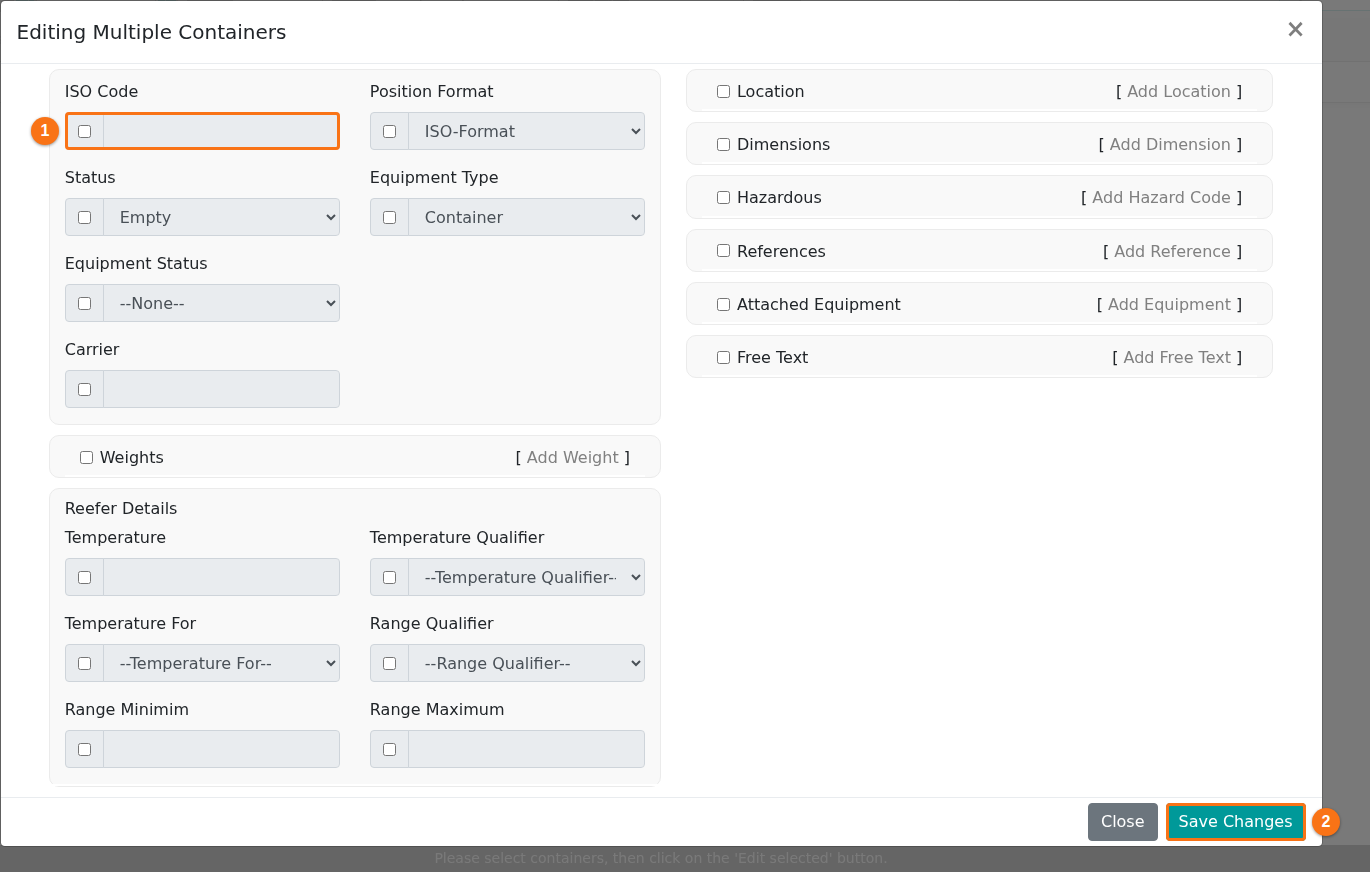
- Click → Edit selected. The Editing Multiple Containers window opens. Each field has a checkbox on its left (1 in the picture). The fields are grey until you tick the checkbox. Save Changes (2 in the picture) is at the bottom right.
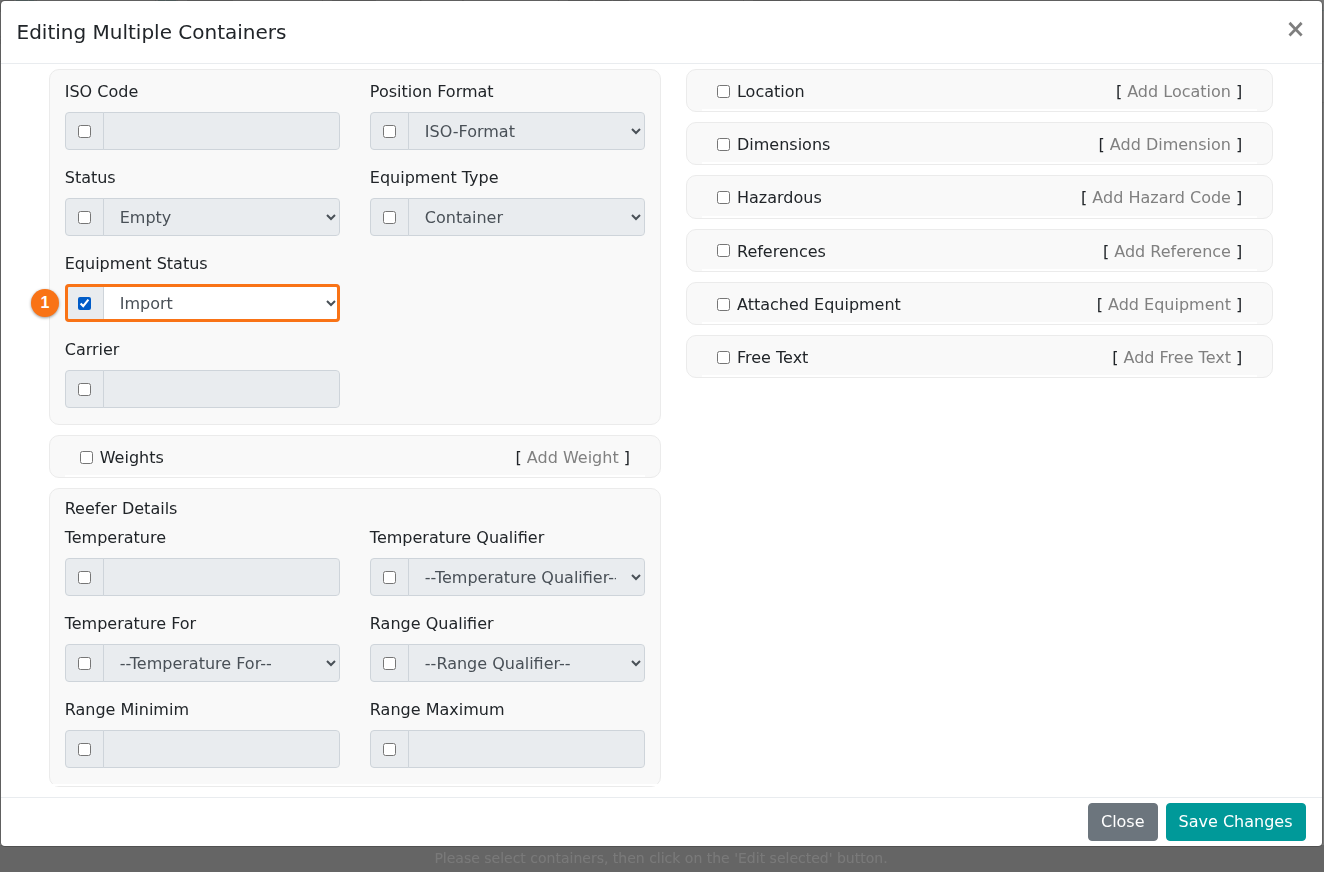
- Tick the checkbox at the left of each field you want to change. The field becomes editable. A field that has only fixed values is a list (drop-down). In the picture, the checkbox of Equipment Status is ticked and the value Import is chosen (1 in the picture).
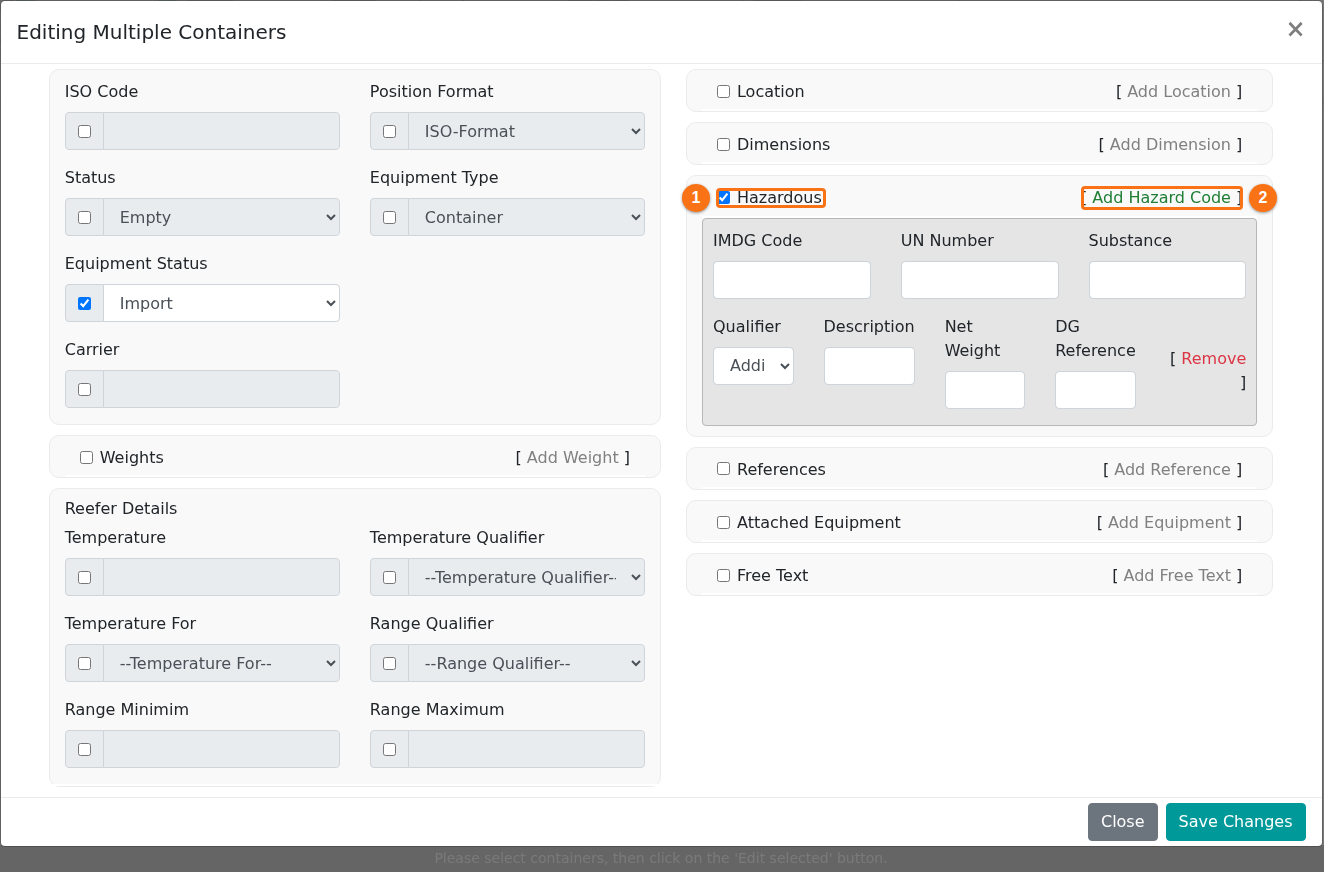
- For a section such as Hazardous, tick the checkbox of the section first (1 in the picture). Then click the green link next to it, here Add Hazard Code (2 in the picture). Boxes open where you can enter more information: IMDG Code, UN Number, Substance, Qualifier, Description, Net Weight and DG Reference.
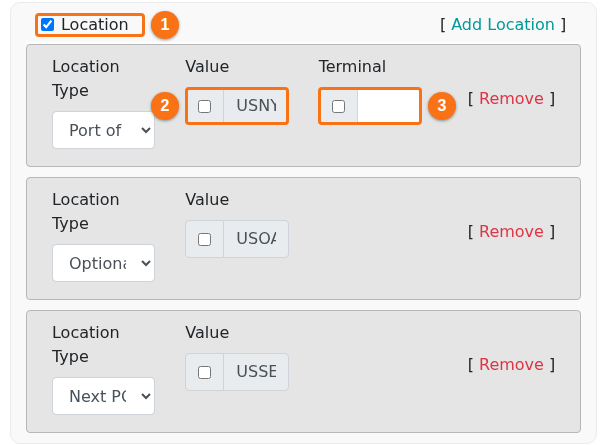
- For the Location section, tick the checkbox of the section (1 in the picture). The location lines show, for example Port of Load, Optional POD and Next POD. Each line has a Value box with a checkbox on its left (2 in the picture). The first line also has a Terminal box with a checkbox (3 in the picture). Tick the checkbox of the part you want to change.
- Click Save Changes at the bottom of the window.
Note: only the fields with a ticked checkbox change, and they change for all selected containers. All other fields keep their values.
If you click → Edit selected and no container is selected, a window says “Please select containers to edit”.
After you save, the application reloads only the changed rows and keeps your colours. The selection is cleared. The form saves your changes at once. There is no undo.
Remove properties from many containers
Section titled “Remove properties from many containers”Use this to remove some data from all selected containers at once.
- Select the containers. See “Select containers”.
- Click → Remove properties from selected. The window Remove properties from selected opens.
- Tick the data you want to remove: Remove Temperature, Remove Container Number, Remove Hazardous or Remove OOG. The application remembers your choices for the next time.
- Click OK to remove the data. Click CLOSE to cancel. Nothing is changed.
Good to know
Section titled “Good to know”- Edit mode pauses the automatic refresh of the file.
- Edit mode works only on the data of containers. To change the position of a container, use Move mode. See How to use the Move Containers feature in 2D Bay View.